


You containerized your app. Now it’s amnesiac and antisocial. Let’s fix that.
Go beyond single containers. Learn how to give your Dockerized apps persistent memory (Volumes), let them talk (Networks), and manage it all easily (Compose).


Estimated Read Time: 11 minutes
Keywords: Docker Compose, Docker Volumes, Docker Networking, Persistent Storage, Container Communication, Multi-container applications, Docker Best Practices, docker-compose.yml, Service Discovery
New to containers? Start with my first post – it's like an intro course with better jokes.
Okay, My App’s in a Box. Now What?
So, you’ve containerized your app. It runs! It’s portable! You’ve officially broken free from the ‘but it works on my machine’ trap. But now you're asking:
"Wait... where does my data go? How does my frontend talk to my backend? Why is localhost not localhosting??"
Welcome to Docker: The Sequel – where we solve your existential crises with Volumes, Networks, and Compose.
TL;DR: What You’ll Learn
Docker Volumes: Give your containers memory like a goldfish on Adderall.
Docker Networks: Make your containers talk to each other like polite microservice citizens.
Docker Compose: Stop copy-pasting
docker runcommands like a caveman.
1. Docker Volumes: Giving Your Boxes Persistent Memory
By default, containers are wonderfully, infuriatingly forgetful. Their filesystems are ephemeral – carved out of image layers and discarded like yesterday's coffee grounds when the container exits. Great for stateless purity, terrible for, say, a database. Or user uploads. Or anything you'd actually like to keep.
Enter Volumes: Think of them as persistent USB drives that Docker plugs into your containers. They live outside the container's lifecycle, managed by Docker itself.
Why Volumes rock?
Data Survival: Your precious data survives container restarts, updates, and removals. Phew.
Decoupling: Keeps your application data separate from the container image and the host filesystem's clutter.
Sharing: Volumes can potentially be shared between multiple containers (use with caution).
The Main Flavors of Storage:

Bind Mounts:
services:
  webapp:
    build: ./webapp
    volumes:
      - ./webapp:/app # (hostDirectory):(containerDirectory)
What’s a bind mount?A direct wormhole from a specific directory on your host machine right into the container. You control the host side explicitly.
Best For: Development! Mounting your source code (
./webapp:/app) into the container allows you to edit code on your host and see changes reflected instantly inside the container. Also useful for injecting config files from the host.The Catch: The container gets direct, potentially write, access to that exact spot on your host. Permissions matter. A rogue container process could wreak havoc.
Warning: Using bind mounts for production database files? Don't. It's like handing root access keys to a toddler holding a magnet. Technically possible, fundamentally unsound. For anything stateful you care about, use named volumes. You don't want myapp-container accidentally rm -rf / your home directory.
Named Volumes:
services:
  database:
    image: postgres:15
    volumes:
      - db_data:/var/lib/postgresql/data # Mount named volume 'db_data'

volumes:
  db_data: # Docker manages this volume
What’s a named volume? A storage space managed entirely by Docker, usually located in a dedicated area on the host (
/var/lib/docker/volumes/on Linux, but don't touch it directly!). You give it a name (db_data), Docker handles the rest.Best For: Databases, user uploads, any critical application state. This is the recommended way for most persistence needs. It's clean, portable, and plays nice with Docker's tooling.
Did I really need to declare db_data: at the bottom? Technically, Compose will often auto-create it with default settings if you omit the top-level volumes: block. But don't. Be explicit. Future You, debugging a complex setup at 3 AM, will thank Past You for the clarity. Explicit is better than implicit, especially when data loss is on the line.
So, data can persist. Great. But containers are still islands. How do they send messages in bottles?
2. Docker Networking: Letting Your Boxes Talk (Without Yelling Through a Wall)
The classic newbie trap: Container A needs to talk to Container B (say, a web app talking to a database). You configure the app to use localhost:5432. It fails. Utterly. Why?!

Because containers are isolated! This is a feature, mostly. Thanks to Linux network namespaces (and other namespace types like pid, mnt, user), each container gets its own sandboxed view of the system resources, including the network stack. Glorious, frustrating isolation.
. Text overlay reads: \"WHEN YOU REALIZE LOCALHOST ≠ LOCALHOST\".")
Docker Networks to the Rescue:
Docker lets you create virtual networks that your containers can connect to. Think of it as creating a private little LAN party just for your application's services.
How Compose Makes Networking Easy Peasy:
When you run docker-compose up, it performs some delightful background magic:
Creates a Network: Usually a bridge network named <projectname>_default.
Connects Services: Plugs all services defined in your YAML into this network.
Enables DNS: Runs a tiny, embedded DNS resolver within that network. This is the linchpin!
Service Discovery via DNS:
Because of that embedded DNS, any container on the Compose network can find any other container on the same network simply by using its service name (the name you give it in docker-compose.yml, like db or cache or api).
DATABASE_HOST = 'db' # Not 'localhost' or some IP address!
DATABASE_PORT = 5432
Docker's DNS automatically resolves db to the internal IP address of the db container on that private network. No more hardcoding IPs, no more localhost confusion!
.")
Exposing Services to the Outside World (Your Browser):
Internal chatter is nice, but users need to hit your frontend. You need to publish a port, mapping a port on your host machine to a port inside a specific container.
services:
  webapp:
    build: ./webapp
    ports:
      - "8080:80" # HostPort:ContainerPort
This maps port
8080on your host machine (the one you type into your browser) to port80inside thewebappcontainer (where your web server like Nginx or Apache might be listening).Now http://localhost:8080 on your machine connects to the
webappcontainer, running on port 80.
Best Practice: Be stingy with ports. Only expose what absolutely needs external access (usually just the main web entry point or API gateway). Keep your database, cache, and other internal services hidden away on their private Docker network, inaccessible directly from the host or outside world. Defense in depth, people!
3. Docker Compose: The Multi-Box Blueprint
Okay, volumes handle persistence, networks handle communication. But defining all that, plus build contexts, environment variables, and startup dependencies for each service using individual docker run commands? That’s not just tedious, it’s asking for typos and inconsistencies.
It’s like trying to build a LEGO Millennium Falcon blindfolded, using only verbal instructions from a confused parrot.

Enter Docker Compose:
Compose lets you define your entire multi-container application stack – services, networks, volumes, configurations – in a single, declarative YAML file (usually docker-compose.yml). One file to define them all, one command to bring them up.
It’s like having a detailed blueprint for your entire application setup. Instead of barking individual docker run commands like a drill sergeant, you describe the desired end state, and Compose makes it happen.
Let's build a configuration for a typical web application setup: a custom webapp service (built from a Dockerfile), a PostgreSQL db service, and a Redis cache service.
The Version:
version: '3.8'This specifies the Compose file format version we're using. Different versions support different features. Using a recent version like 3.8 is generally a good idea.
Define services:
The services key is where we define each container that makes up our application.
The webapp Service:
This is our main application container.
services:
  webapp:
    build:
      context: ./webapp
      dockerfile: Dockerfile
    ports:
      - "8080:80"
    env_file:
      - .env
    volumes:
      - ./webapp:/app
    networks:
      - frontend
      - backend
    depends_on:
      db:
        condition: service_started
      cache:
        condition: service_started
build:Tells Compose to build an image from a Dockerfile located in the./webappdirectory.ports:Exposes port 80 inside the container as port 8080 on the host machine (HostPort:ContainerPort). This lets us access the app via http://localhost:8080env_file:Loads environment variables from a.envfile in the same directory. Crucial for secrets!volumes:Mounts the local./webappdirectory into/appinside the container. This is a bind mount, great for development as code changes are reflected live.networks:Connects this container to two networks:frontend(for external access) andbackend(to talk to internal services).depends_on:Tells Compose to start thedbandcacheservices before starting thewebapp. Thecondition: service_startedwaits only for the container process to launch, not necessarily for the application inside to be fully ready (more on that later). While depends_on ensures the container starts, it doesn't guarantee the application inside (like Postgres) is ready to accept connections. For bulletproof startup, look into health checks or entrypoint scripts.

The db service:
Our PostgreSQL database container.
  db:
    image: postgres:15
    env_file:
      - .env
    volumes:
      - postgres_data:/var/lib/postgresql/data
    networks:
      - backend
image: postgres:15Tells Compose to pull the official PostgreSQL version 15 image from Docker Hub.env_file:Loads necessary environment variables (likePOSTGRES_DB,POSTGRES_USER,POSTGRES_PASSWORD) from the.envfile. Never hardcode credentials here!volumes:Mounts a named volume calledpostgres_datato the standard PostgreSQL data directory. This ensures our database data persists even if the container is removed.networks:Connects the database only to the internalbackendnetwork. It doesn't need direct external access.

The cache service:
Our Redis cache container:
  cache:
    image: redis:alpine
    networks:
      - backend
image: redis:alpinePulls the lightweight Alpine variant of the official Redis image.networks:Connects the cache only to the internalbackendnetwork.

Defining Top-Level Volumes:
We need to formally declare any named volumes used by our services.
volumes:
  postgres_data: {}
This tells Docker to manage a named volume called postgres_data. If it doesn't exist, Docker creates it. The empty {} uses default driver settings, which is usually what you want.
Defining Top-Level Networks:
By default, Docker Compose throws all your services into one big shared network—kind of like seating every department of a company at one long lunch table. That works, but it’s not ideal when frontend devs are yelling across the table at the database.
Instead, we define custom networks to better organize the convo:
networks:
  frontend:
    driver: bridge
  backend:
    driver: bridge
Let’s break that down:
frontendandbackendare just labels we choose to describe logical groupings. You might connect your web UI and static content services tofrontend, and your API and database tobackend.driver: bridgetells Docker to use the bridge network driver, which is the default for containers on a single machine. Think of it like Docker setting up its own mini Wi-Fi inside your machine, where containers get their own IPs and can talk to each other without exposing those ports to the outside world.
This setup keeps your services talking cleanly, securely, and only to the ones they need. Like putting Slack channels in place instead of shouting across the office.
Curious about other network drivers like
host,overlay, ormacvlan? They’re powerful, especially for multi-host setups or advanced networking—but for most local Compose setups,bridgeis your go-to.If you want to dive deeper into the networking rabbit hole, take a look at this docs
Putting It All Together:
Here is the complete docker-compose.yml file without comments, incorporating all the sections we just discussed:
version: '3.8'

services:
  webapp:
    build:
      context: ./webapp
      dockerfile: Dockerfile
    ports:
      - "8080:80"
    env_file:
      - .env
    volumes:
      - ./webapp:/app
    networks:
      - frontend
      - backend
    depends_on:
      db:
        condition: service_started
      cache:
        condition: service_started

  db:
    image: postgres:15
    env_file:
      - .env
    volumes:
      - postgres_data:/var/lib/postgresql/data
    networks:
      - backend

  cache:
    image: redis:alpine
    networks:
      - backend

volumes:
  postgres_data: {}

networks:
  frontend:
    driver: bridge
  backend:
    driver: bridge

And the corresponding .env file (KEEP THIS OUT OF GIT!):
Remember to create a .env file. Add .env to your .gitignore right now. Seriously. Do it. Don't be that person who commits credentials.
CACHE_URL=redis://cache:6379
SECRET_KEY=a_very_secret_and_random_string_for_production


POSTGRES_DB=myappdb
POSTGRES_USER=webapp_user
POSTGRES_PASSWORD=supersecret_and_complex_password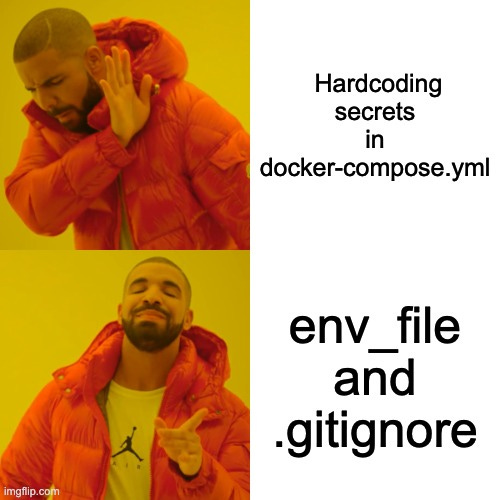
Key Improvements & What's Happening:
env_file:is Your Friend: All sensitive data (DB passwords, API keys) and environment-specific config (CACHE_URL,POSTGRES_DB) are loaded from the.envfile. This keeps secrets out of your version-controlleddocker-compose.yml. Seriously, add.envto your.gitignoreright now.Named Volume for DB:
postgres_dataensures your database survives container removal.Networks: We defined two networks:
frontend(for thewebappwhich needs external access viaports) andbackend(for internal communication betweenwebapp,db, andcache). Thedbandcacheare only on thebackendnetwork, providing an extra layer of isolation.depends_on:: Makeswebappwait fordbandcachecontainers to start. Important Note: This doesn't guarantee the application inside the container is ready (e.g., Postgres might still be initializing). For robust dependency checking, explore Docker'shealthcheckfeature within your Dockerfiles or use entrypoint scripts that wait for services to be truly available.
No Exposed DB Port: The
dbservice doesn't have aportssection. It's only accessible from within the Dockerbackendnetwork (specifically, by thewebapp). Security++!
depends_on lies. (Based on a true story)

Your Compose Toolkit (Essential Commands):
# Start everything defined in docker-compose.yml (builds if needed)
docker-compose up

# Start in detached mode (runs in background)
docker-compose up -d

# Stop and remove containers, networks defined in the Compose file
docker-compose down

# Stop, remove containers/networks AND named volumes (use carefully!)
docker-compose down -v

# Rebuild images for services that have a 'build' instruction
docker-compose build

# List running services managed by Compose
docker-compose ps

# View logs from all services (Ctrl+C to stop)
docker-compose logs

# Follow logs in real-time for a specific service
docker-compose logs -f webapp

# Execute a command inside a running service container (e.g., open a shell)
docker-compose exec webapp bash

# Example: Connect to PostgreSQL inside the 'db' container
docker-compose exec db psql -U webapp_user -d myappdbRecap: From Container Chaos to Composed Clarity (and Beyond!)
You've leveled up! Now you know how to handle multi-container applications like a pro:
Give your containers persistent memory using Volumes (named volumes for the win!).
Enable reliable communication using Docker Networks and service names (thanks, Compose DNS!).
Define and manage your entire stack declaratively with Docker Compose (and keep secrets safe with
.envfiles!).
Stop wrestling with individual docker run commands and tangled dependencies. Embrace the declarative power of Compose for local development, testing, and even simpler production setups.
What's Next? Mastered Compose on one machine? Feeling brave? The next circle of hell... er, I mean, the next level of scalability involves orchestrators like Kubernetes. Think Compose is like managing a intricate model train set; Kubernetes is like designing and running the entire national railway system, including signal failures, derailments, and occasional llama incidents. Compose is the essential stepping stone. What fresh hell... I mean, challenges have you faced with multi-container apps?
Further Reading
Docker Volumes: https://docs.docker.com/storage/volumes/
Docker Networking: https://docs.docker.com/network/
Docker Compose Overview: https://docs.docker.com/compose/
Using
.envfiles in Compose: https://docs.docker.com/compose/environment-variables/set-environment-variables/#use-the-env_file-attribute